Introduction
For some time now, I have been interested in Talos, an operating system for Kubernetes. I installed my first Talos cluster later in 2023, and my “production” (composed of 3 Raspberry Pi) is now running under this OS.
It is a solution that attracted me because of its simplicity, security and ease of administration.
Today, I finally decided to write this page to present Talos, and share my experience with this OS.
What is Talos?
As said before, Talos is an OS specifically designed for Kubernetes. It is an immutable and minimalist system.
What is an immutable OS?
After tinkering with a few definitions, I came across this one which seems to me to be the clearest:
An immutable distribution ensures that the core of the operating system remains unchanged. The root filesystem of an immutable distribution remains read-only, allowing it to remain the same across multiple instances. Of course, you can change things if you want. But the capability remains disabled by default.
Source: Linux-Console.net
With this in mind, Talos allows you to install a Kubernetes node in a matter of minutes without having to worry about OS configuration. In addition, Talos is not only administered with a simple SSH, it offers an API to manage nodes with the same principle as kubectlwith Kubernetes.
Normally at this point, some people grimace and say “yet another thing that will be impossible to debug”. But SideroLabs (the company behind Talos) has thought of everything and the absence of a bash will not block you in your daily maintenance. The utility talosctlincludes many tools such as generating a pcap report to debug a network problem, consulting logs, ways to check the status of the cluster, etc.
In short, Talos is a mature solution with an active community and used by many companies.
The extensions
Due to its minimalist nature, Talos does not contain packages that are considered “useless” by most. However, it is possible to install extensions to add features. For example, it is possible to install qemu-guest-agentto have information about the virtual machine, or iscsi-toolsto mount iSCSI disks.
These extensions are available on a repository managed by SideroLabs: siderolabs/extensions
If you’re not yet convinced, I hope the rest of this article will make you want to try Talos.
Install talosctl
The entry point to use Talos is talosctl. This is the CLI utility that allows you to generate the cluster configuration, apply it to the machines, manage the nodes, view the logs, etc. It can be installed on Linux, MacOS and Windows.
On Linux, it can be installed by running the following command:
curl -sL https://talos.dev/install | shGenerate configuration
Before doing anything, we need to generate the encryption keys for our cluster using the command talosctl gen secrets. We then obtain a file secrets.yamlthat contains the encryption keys to authenticate on the cluster nodes.
Once the keys are produced, we can generate the cluster configuration with the command talosctl gen config by specifying the name of the cluster as well as an endpoint of one of the controlplane nodes (which will allow the nodes to join the cluster) .
talosctl gen config homelab-talos-dev https://192.168.128.110:6443 --with-secrets ./secrets.yaml --install-disk /dev/sdaWe get the files controlplane.yaml, worker.yamland talosconfig. These contain the configuration of our cluster, and the file talosconfig, the keys to authenticate on the different nodes of the cluster to the Talos API.
At first I was editing the files directly to add settings specific to my infrastructure, but in hindsight I realize that this is not the right approach. It is better to store the configuration delta in a file patch.yamland apply it with the talosctl gen config --config-patch @patch.yaml.
# pach.yaml
machine:
  install:
    extraKernelArgs:
      - net.ifnames=0
cluster:
  proxy:
    disabled: true
  network:
    cni:
      name: none # On installera Cilium manuellement
  apiServer:
    certSANs:
      - 192.168.1.1
      - 127.0.0.1
This way I only have to edit the file patch.yamland then regenerate the configuration files every time I want to apply changes.
On the other hand, I cannot have a different configuration for controlplanes and workers, it will then be necessary to generate a configuration file per machine type (we will talk about a solution for that later) .
Install the cluster
My configuration is ready (after the talosctl gen config --config-patch @patch.yaml), all that remains is to send it to the machines that will make up the cluster.
To install these servers, I downloaded the Talos image from the Talos Github repository and installed it on my Proxmox hypervisors.
The Talos ISO is very light, less than 100MB and no installation is required (it will be done automatically when receiving the configuration).
| Name | IP address | Role |
|---|---|---|
| controlplane-01 | 192.168.1.85 | Control Plane |
| controlplane-02 | 192.168.1.79 | Control Plane |
| controlplane-03 | 192.168.1.82 | Control Plane |
| worker-01 | 192.168.1.83 | Worker |
| worker-02 | 192.168.1.86 | Worker |
Before applying the configuration, I will check that the disks are correctly detected by Talos (and that they are using the correct disk for the installation) .
$ talosctl disks --insecure -n 192.168.1.85 -e 192.168.1.85
DEV        MODEL           SERIAL   TYPE   UUID   WWID   MODALIAS      NAME   SIZE    BUS_PATH                                                                   SUBSYSTEM          READ_ONLY   SYSTEM_DISK
/dev/sda   QEMU HARDDISK   -        HDD    -      -      scsi:t-0x00   -      34 GB   /pci0000:00/0000:00:05.0/0000:01:01.0/virtio2/host2/target2:0:0/2:0:0:0/   /sys/class/block
I did indeed use it /dev/sdafor the Talos installation, so I can apply the configuration on the machines.
What if my nodes don’t use the same disk for installation?
To do this, you will need to duplicate the configuration file and modify the field installDisk for each machine.
Below we will talk about talhelperwho offers a solution to generate a configuration file per machine.
# Appliquer la configuration sur les nœuds controlplane
talosctl apply-config --insecure -n 192.168.1.85 -e 192.168.1.85 --file controlplane.yaml
talosctl apply-config --insecure -n 192.168.1.79 -e 192.168.1.79 --file controlplane.yaml
talosctl apply-config --insecure -n 192.168.1.82 -e 192.168.1.82 --file controlplane.yaml
# Appliquer la configuration sur les nœuds worker
talosctl apply-config --insecure -n 192.168.1.83 -e 192.168.1.83 --file worker.yaml
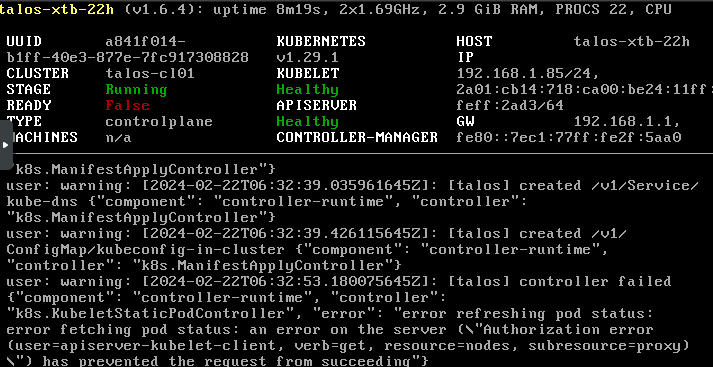
talosctl apply-config --insecure -n 192.168.1.86 -e 192.168.1.86 --file worker.yamlThe machines are installed, we can follow the progress of the installation directly on the hypervisor (or with talosctl logs/ talosctl dmesg) .
If all goes well, you should see an error:
trucmuche - Service "etcd" to be "up"This error is not really an error, it means that the database etcdis not initialized yet. We will take care of it right away with the command talosctl bootstrapby designating one of the controlplanes.
talosctl bootstrap -e 192.168.1.85 --talosconfig ./talosconfig --nodes 192.168.1.85Now if we look at the cluster nodes we should see that the control planes are not in a state Ready.
The reason: We don’t have any CNI yet! Let’s get ours back kubeconfigand solve this problem.
$ talosctl kubeconfig -e 192.168.1.85 --talosconfig ./talosconfig --nodes 192.168.1.85
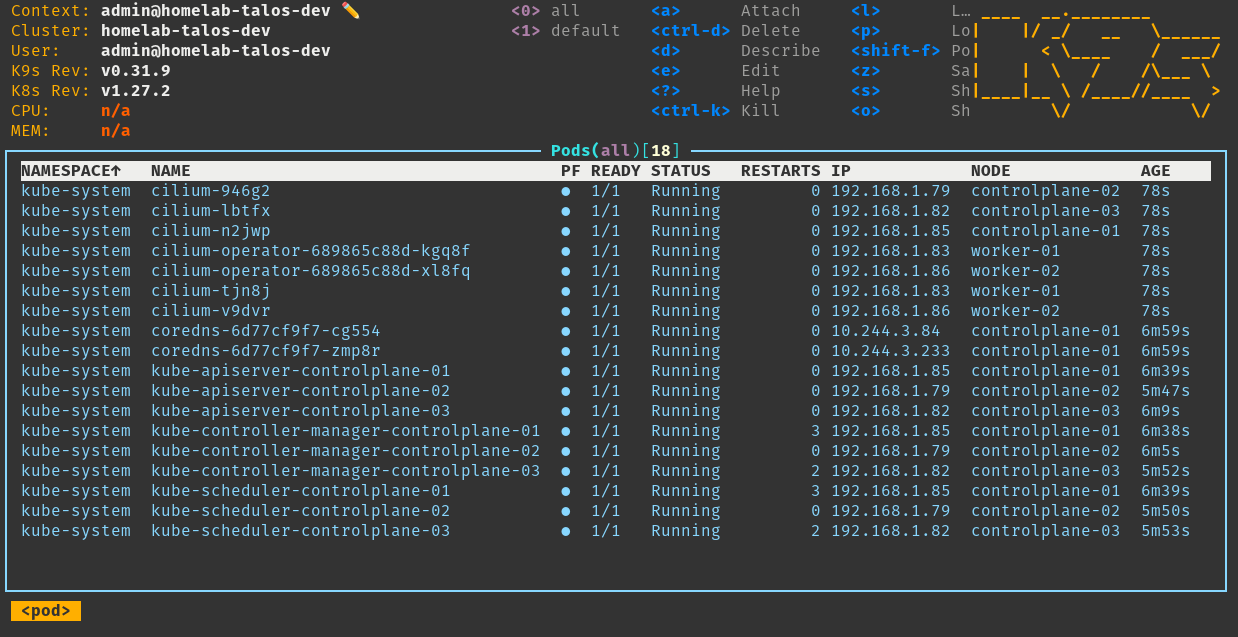
$ kubectl get nodes
NAME STATUS ROLES AGE VERSION
talos-8tc-18b NotReady control-plane 6m5s v1.29.1
talos-fiy-ula NotReady <none> 2m48s v1.29.1
talos-x5n-ji0 NotReady <none> 2m43s v1.29.1
talos-xtb-22h NotReady control-plane 6m7s v1.29.1
talos-ypm-jy8 NotReady control-plane 6m3s v1.29.1
$ kubectl describe node talos-8tc-18b
# [ ... ]
Conditions:
Type Status LastHeartbeatTime LastTransitionTime Reason Message
---- ------ ----------------- ------------------ ------ -------
MemoryPressure False Thu, 22 Feb 2024 07:38:31 +0100 Thu, 22 Feb 2024 07:33:13 +0100 KubeletHasSufficientMemory kubelet has sufficient memory available
DiskPressure False Thu, 22 Feb 2024 07:38:31 +0100 Thu, 22 Feb 2024 07:33:13 +0100 KubeletHasNoDiskPressure kubelet has no disk pressure
PIDPressure False Thu, 22 Feb 2024 07:38:31 +0100 Thu, 22 Feb 2024 07:33:13 +0100 KubeletHasSufficientPID kubelet has sufficient PID available
Ready False Thu, 22 Feb 2024 07:38:31 +0100 Thu, 22 Feb 2024 07:33:13 +0100 KubeletNotReady container runtime network not ready: NetworkRe
ady=false reason:NetworkPluginNotReady message:Network plugin returns error: cni plugin not initialized
# [ ... ]There is indeed a CNI missing. I will then install Cilium (which will also replace kube-proxy in my case) .
The Talos documentation directly provides the command to install Cilium by replacing kube-proxy. We will apply it directly to the cluster.
$ helm repo add cilium https://helm.cilium.io/
$ helm repo update
$ helm install \
    cilium \
    cilium/cilium \
    --version 1.15.0 \
    --namespace kube-system \
    --set=ipam.mode=kubernetes \
    --set=bpf.masquerade=true \
    --set=kubeProxyReplacement=true \
    --set=securityContext.capabilities.ciliumAgent="{CHOWN,KILL,NET_ADMIN,NET_RAW,IPC_LOCK,SYS_ADMIN,SYS_RESOURCE,DAC_OVERRIDE,FOWNER,SETGID,SETUID}" \
    --set=securityContext.capabilities.cleanCiliumState="{NET_ADMIN,SYS_ADMIN,SYS_RESOURCE}" \
    --set=cgroup.autoMount.enabled=false \
    --set=cgroup.hostRoot=/sys/fs/cgroup \
    --set=k8sServiceHost=localhost \
    --set=k8sServicePort=7445
NAME: cilium
LAST DEPLOYED: Fri Feb 23 09:43:35 2024
NAMESPACE: kube-system
STATUS: deployed
REVISION: 1
TEST SUITE: None
NOTES:
You have successfully installed Cilium with Hubble.

Your release version is 1.15.0.

For any further help, visit https://docs.cilium.io/en/v1.15/gettinghelp
Our nodes are ready to host pods!
Define nodes/endpoints
Since the beginning of this article, we specify with each talosctl command :
- An IP address of a talos control-plane (endpoint).
- The IP address of the machine on which we are running the command.
- The configuration file
talosconfigwe generated (containing what is needed to authenticate to the cluster).
This quickly becomes tedious, especially if you have a lot of machines to manage. It is then possible to define this information in a folder ~/.talosas you would kubectlwith ~/.kube.
talosctl --talosconfig=./talosconfig config endpoint 192.168.1.85 192.168.1.82 192.168.1.79 # Control plane
talosctl --talosconfig=./talosconfig config node 192.168.1.85 192.168.1.82 192.168.1.79 192.168.1.83 192.168.1.86 # controle plane + nodes
talosctl config merge ./talosconfig
With these commands, I edit the file ./talosconfigto add the IP addresses of the endpoints, and the machines in the cluster, then I merge this file with the ~/.talos/config.
Information :
Just like
kubectlallows: it is possible to have multiple contexts to manage multiple clusters. Just add an argument--contextto the commandtalosctlor edit the file~/.talos/configto add a new context.
I no longer have to specify the IP address of the endpoint or machine on which I am running the command, and then talosctlgo and get this information from the ~/.talos/config.
$ talosctl disks
NODE           DEV        MODEL           SERIAL   TYPE   UUID   WWID   MODALIAS      NAME   SIZE    BUS_PATH                                                                   SUBSYSTEM          READ_ONLY   SYSTEM_DISK
192.168.1.79   /dev/sda   QEMU HARDDISK   -        HDD    -      -      scsi:t-0x00   -      34 GB   /pci0000:00/0000:00:05.0/0000:01:01.0/virtio3/host2/target2:0:0/2:0:0:0/   /sys/class/block               *
192.168.1.85   /dev/sda   QEMU HARDDISK   -        HDD    -      -      scsi:t-0x00   -      34 GB   /pci0000:00/0000:00:05.0/0000:01:01.0/virtio3/host2/target2:0:0/2:0:0:0/   /sys/class/block               *
192.168.1.82   /dev/sda   QEMU HARDDISK   -        HDD    -      -      scsi:t-0x00   -      34 GB   /pci0000:00/0000:00:05.0/0000:01:01.0/virtio3/host2/target2:0:0/2:0:0:0/   /sys/class/block
# [ ... ]
Update the cluster
Of course, Talos supports updating kubeleta node without necessarily having to reinstall the entire system.
To do this, the utility talosctlhas an argument upgrade-k8s. You just need to specify the version of kubelet you want to install and the designated node will be updated.
Warning
Please note that it is not possible to migrate from multiple major versions in one go (e.g. from 1.27 to 1.29) . You will then have to update each major version one by one (first from 1.27 to 1.28, then from 1.28 to 1.29) .
Talos will therefore update each node one by one, and restart it (if necessary) to apply the changes.
$ talosctl upgrade-k8s --to 1.29.1 -n 192.168.1.85 # Même s'il n'y a qu'un nœud précisé, ils seront tous mis à jourModify a node’s configuration
It is possible to modify the configuration of one of the machines in the cluster at any time. This is essential to be able to update IP addresses, or add parameters to an existing installation.
For example, if I want to change the hostname from <hostname> talos-8tc-18bto <hostname> talos-controlplane-01, I can do it in several ways:
- By interactively editing the machine configuration:
talosctl -n <IP1>,<IP2>,... edit machineconfig- By creating one
patch.yamland sending it to the nodes:
- op: add
  path: /machine/network/hostname
  value: talos-controlplane-01
talosctl -n <IP1>,<IP2> patch machineconfig -p @patch.yaml- Or by applying this same patch in JSON directly in the command:
talosctl -n <IP> patch machineconfig -p '[{"op": "add", "path": "/machine/network/hostname", "value": "talos-controlplane-01"}]'Depending on the change made, Talos will automatically reboot the machine to apply the configuration (or not, if not necessary) .
One file per machine with talhelper
The configuration of talosctlis very convenient and pleasant to use. Only the file patch.yamlis to be saved on a Git and the files secret.yamland talosconfigto be kept safe in a vault or equivalent (the other files controlplane.yamland worker.yamlare re-generable, the backup of these files is then less relevant) .
But I remain no less frustrated by a limitation of talosctl:
- In fact, it does not allow to generate a configuration file per machine of the cluster.
So if I want to create a cluster with drastically different machines, I will have to create a configuration file per machine (which is tedious) .
To overcome these problems budimanjojo developed talhelper .
talhelperis a go program that addresses this issue: It generates a file per machine in the cluster from a single configuration file and will help you generate the commands to apply the configuration to the machines.
Use talhelper
As previously stated, talhelperrelies on a single configuration file: talconfig.yaml. This will contain the information for each machine in the cluster, at a minimum:
- The host name;
- The IP address;
- The disk to install talos on.
There are many optional parameters to customize the configuration of each machine. For example, you can configure VIPs, routes, additional disks, Talos extensions (kata-containers, qemu-guest-agent, iscsi-tools) , patches for Talos configuration, etc.
To create this file, I use the template provided on the talhelper site .
Noticed :
Note that many parameters are not valued in the template. The documentation
talhelperis very correct and even if a parameter is not taken into account, it is possible to add a patch that will be applied when generating the configuration.
For example, I want to disable the use of discovery in my talconfig, problem: talhelperit doesn’t have any parameter to disable that. I can then create a ‘patch’ that will be applied when talhelpergenerating the configuration.
To do this, I just need to put these lines in my talconfig.yaml:
patches:
  - |-
    - op: add
      path: /cluster/discovery/enabled
      value: false
My file talconfig.yamllooks like this:
---
clusterName: homelab-talos-dev
talosVersion: v1.6.5
kubernetesVersion: v1.27.2
endpoint: https://192.168.1.85:6443
allowSchedulingOnMasters: true
cniConfig:
  name: none
patches:
  - |-
    - op: add
      path: /cluster/discovery/enabled
      value: true
    - op: replace
      path: /machine/network/kubespan
      value:
        enabled: true
nodes:
  - hostname: controlplane-01
    ipAddress: 192.168.1.85
    controlPlane: true
    arch: amd64
    installDisk: /dev/sda
    nameservers:
      - 1.1.1.1
      - 8.8.8.8
    networkInterfaces:
      - interface: eth0
        addresses:
          - 192.168.1.85/24
        routes:
          - network: 0.0.0.0/0
            gateway: 192.168.1.1
        vip:
          ip: 192.168.1.80
  - hostname: controlplane-02
    ipAddress: 192.168.1.79
    controlPlane: true
    arch: amd64
    installDisk: /dev/sda
    nameservers:
      - 1.1.1.1
      - 8.8.8.8
    networkInterfaces:
      - interface: eth0
        addresses:
          - 192.168.1.79/24
        routes:
          - network: 0.0.0.0/0
            gateway: 192.168.1.1
        vip:
          ip: 192.168.1.80
  - hostname: controlplane-03
    ipAddress: 192.168.1.82
    controlPlane: true
    arch: amd64
    installDisk: /dev/sda
    nameservers:
      - 1.1.1.1
      - 8.8.8.8
    networkInterfaces:
      - interface: eth0
        addresses:
          - 192.168.1.82/24
        routes:
          - network: 0.0.0.0/0
            gateway: 192.168.1.1
        vip:
          ip: 192.168.1.80
  - hostname: worker-01
    ipAddress: 192.168.1.83
    controlPlane: false
    arch: amd64
    installDisk: /dev/sda
  - hostname: worker-02
    ipAddress: 192.168.1.86
    controlPlane: false
    arch: amd64
    installDisk: /dev/sda
controlPlane:
  patches:
    - |-
      - op: add
        path: /cluster/proxy/disabled
        value: true
  schematic:
    customization:
      extraKernelArgs:
        - net.ifnames=0
      systemExtensions:
        officialExtensions:
#          - siderolabs/kata-containers # Disponible à la sortie de Talos 1.7
          - siderolabs/qemu-guest-agent
          - siderolabs/iscsi-tools
worker:
  schematic:
    customization:
      extraKernelArgs:
        - net.ifnames=0
      systemExtensions:
       officialExtensions:
#         - siderolabs/kata-containers # Disponible à la sortie de Talos 1.7
         - siderolabs/qemu-guest-agent
         - siderolabs/iscsi-tools
We start by generating the file talsecret.yaml. This is strictly equivalent to the file secret.yamlgenerated by talosctl (so it is possible to use the one we generated previously) .
talhelper gensecret > talsecret.yaml # ou talosctl gen secretsNext, we generate the configuration files for each machine in the cluster.
$ talhelper genconfig
  There are issues with your talhelper config file:
  field: "talosVersion"
    * WARNING: "v1.6.5" might not be compatible with this Talhelper version you're using
  generated config for controlplane-01 in ./clusterconfig/homelab-talos-dev-controlplane-01.yaml
  generated config for controlplane-02 in ./clusterconfig/homelab-talos-dev-controlplane-02.yaml
  generated config for controlplane-03 in ./clusterconfig/homelab-talos-dev-controlplane-03.yaml
  generated config for worker-01 in ./clusterconfig/homelab-talos-dev-worker-01.yaml
  generated config for worker-01 in ./clusterconfig/homelab-talos-dev-worker-01.yaml
  generated client config in ./clusterconfig/talosconfig
  generated .gitignore file in ./clusterconfig/.gitignore
Information :
talhelperwill itself generate a file.gitignorethat prevents a push of the files containing the keys to a Git.
In my case it contains the following lines:
homelab-talos-dev-controlplane-01.yaml
homelab-talos-dev-controlplane-02.yaml
homelab-talos-dev-controlplane-03.yaml
homelab-talos-dev-worker-01.yaml
talosconfig
The last step is to apply the files to start the cluster installation. talhelperalso allows to generate the bash commands applying each file to the correct IP address.
This avoids applying a configuration file to the wrong machine.
$ talhelper gencommand apply --extra-flags --insecure
  There are issues with your talhelper config file:
  field: "talosVersion"
    * WARNING: "v1.6.5" might not be compatible with this Talhelper version you're using
  talosctl apply-config --talosconfig=./clusterconfig/talosconfig --nodes=192.168.1.85 --file=./clusterconfig/homelab-talos-dev-controlplane-01.yaml --insecure;
  talosctl apply-config --talosconfig=./clusterconfig/talosconfig --nodes=192.168.1.79 --file=./clusterconfig/homelab-talos-dev-controlplane-02.yaml --insecure;
  talosctl apply-config --talosconfig=./clusterconfig/talosconfig --nodes=192.168.1.82 --file=./clusterconfig/homelab-talos-dev-controlplane-03.yaml --insecure;
  talosctl apply-config --talosconfig=./clusterconfig/talosconfig --nodes=192.168.1.83 --file=./clusterconfig/homelab-talos-dev-worker-01.yaml --insecure;
  talosctl apply-config --talosconfig=./clusterconfig/talosconfig --nodes=192.168.1.86 --file=./clusterconfig/homelab-talos-dev-worker-01.yaml --insecure;
Information
the flag --insecureallows to apply without specifying an encryption key, it is mandatory when the node is not yet installed. By default, talhelperdo not add it in the generated commands, that’s why I use the argument --extra-flagsto add this flag.
I can also ask him to provide me with the bootstrap or recovery commands kubeconfig (less interesting but it’s practical) .
$ talhelper gencommand bootstrap
  talosctl bootstrap --talosconfig=./clusterconfig/talosconfig --nodes=192.168.1.85;
$ talhelper gencommand kubeconfig
  talosctl kubeconfig --talosconfig=./clusterconfig/talosconfig --nodes=192.168.1.85;
But Talos doesn’t stop there! It also offers advanced features for making multi-region clusters. Let’s take a closer look.
Cluster Across-Region: KubeSpan
In addition to Talos, SideroLabs wants to address the need for companies to make hybrid and/or multi-region clusters without having to expose the API of a control plane. A common solution is to establish a VPN between the different regions, but this can be expensive and complex to set up.
For example, we could make a cluster where the control planes would be in an on-premise infrastructure, and the workers on a cloud provider (for workloads that require computing power).
This feature is called KubeSpan and is specific to Talos.
KubeSpan is based on Wireguard and uses a service hosted by Talos: Discovery .
To use this feature, it must of course be enabled in the Talos configuration (at /machine/network/kubespan/enabled).
If you have a cluster already in place, you can push this file patch.yamlto the machines to enable service discovery and KubeSpan.
machine:
  network:
    kubespan:
      enabled: true
cluster:
  discovery:
    enabled: true
In practice, Discovery will authenticate machines in the same cluster via the cluster id/secret. These values are generated automatically by talosctl (even if kubspan/discovery is disabled) .
cluster:
  id: vPBXurnpNDVRVkF_DrM4SvA7YNV6xcwt7mnkSKOQQoI=
  secret: +LoNuCGKUDWW0Efo8tph/XkbFI7ffS+w2slsFell+bY=
These tokens are to be kept safe, they allow a node to initiate a connection with the discovery service to another node (even if it is not enough to register in the cluster, it is advisable to keep these tokens safe) .
Behind the discovery service, there is a Wireguard service that allows nodes to communicate with each other without having to do NAT to expose the Kubernetes API.
So I’m going to enable this feature on my cluster. My goal is to have the control-planes on my site, and the workers on Vultr.

Trick :
To reset the cluster,
talhelperprovide a commandtalhelper gencommand resetthat allows you to remove the nodes from the cluster:
$ talhelper gencommand reset --extra-flags --graceful=false
There are issues with your talhelper config file:
field: "talosVersion"
  * WARNING: "v1.6.5" might not be compatible with this Talhelper version you're using
  talosctl reset --talosconfig=./clusterconfig/talosconfig --nodes=192.168.1.85 --graceful=false;
  talosctl reset --talosconfig=./clusterconfig/talosconfig --nodes=192.168.1.79 --graceful=false;
  talosctl reset --talosconfig=./clusterconfig/talosconfig --nodes=192.168.1.82 --graceful=false;
  # [ ... ]
Create Nodes on Vultr
Vultr is a cloud provider that offers instances at very competitive prices. Talos advertises it as a compatible cloud provider, so I will try to create worker nodes on Vultr.
I relied heavily on Talos’ Vultr documentation for this part.
The first step is to upload a Talos ISO to Vultr. For this, I use the cli provided by Vultr vultr-cli .
vultr-cli iso create --url https://github.com/siderolabs/talos/releases/download/v1.6.4/metal-amd64.iso

ID					FILE NAME		SIZE		STATUS		MD5SUM					SHA512SUM														DATE CREATED
61f5fdbe-b773-4aff-b3a5-9c1ae6eee70a	metal-amd64.iso		85168128	complete	65f0eadf019086c4b11f57977d5521b4	cd8f887b91a154132a55dc752a8718fd5ef37177963a5c10c1be295382264b4305757442eea0fa06bff98208d897512f056d3e9701f24678ffe35ad30336fd7a	2024-02-23T11:44:27+00:00
We keep the ID of the ISO which will be used to create our Talos instance (in my case, 61f5fdbe-b773-4aff-b3a5-9c1ae6eee70a).
for i in 1 2; do
  vultr-cli instance create \
          --plan vc2-2c-4gb \
          --region cdg \
          --iso "61f5fdbe-b773-4aff-b3a5-9c1ae6eee70a" \
          --host talos-k8s-${i} \
          --label "Talos Kubernetes" \
          --tags talos,kubernetes \
          --ipv6
done
After 1-2 minutes, the instances are ready. We can then retrieve the IP addresses of the nodes and add them to our configuration.

$ vultr-cli instance list
ID					IP		LABEL			OS			STATUS	REGION	CPU	RAM	DISK	BANDWIDTH	TAGS
ac9150e3-5b07-4d0c-b6a7-4ab1eedde7c3	45.32.146.110	Talos Kubernetes	Custom Installed	active	cdg	2	4096	80	4		[kubernetes, talos]
21fec645-f391-48cb-87a8-8ea11c223afc	217.69.4.72	Talos Kubernetes	Custom Installed	active	cdg	2	4096	80	4		[kubernetes, talos]
We will note these IP addresses and create our file talconfig.yamlwith the information of our nodes.
---
clusterName: cross-region-cluster
talosVersion: v1.6.5
kubernetesVersion: v1.29.1
endpoint: https://192.168.1.85:6443
allowSchedulingOnMasters: true
cniConfig:
  name: none
patches:
  - |-
    - op: add
      path: /cluster/discovery/enabled
      value: true
    - op: replace
      path: /machine/network/kubespan
      value:
        enabled: true
nodes:
  - hostname: controlplane-01
    ipAddress: 192.168.1.85
    controlPlane: true
    arch: amd64
    installDisk: /dev/sda
    networkInterfaces:
      - interface: eth0
        addresses:
          - 192.168.1.85/24
        routes:
          - network: 0.0.0.0/0
            gateway: 192.168.1.1
        vip:
          ip: 192.168.1.80
  - hostname: controlplane-02
    ipAddress: 192.168.1.79
    controlPlane: true
    arch: amd64
    installDisk: /dev/sda
    networkInterfaces:
      - interface: eth0
        addresses:
          - 192.168.1.79/24
        routes:
          - network: 0.0.0.0/0
            gateway: 192.168.1.1
        vip:
          ip: 192.168.1.80
  - hostname: controlplane-03
    ipAddress: 192.168.1.82
    controlPlane: true
    arch: amd64
    installDisk: /dev/sda
    networkInterfaces:
      - interface: eth0
        addresses:
          - 192.168.1.82/24
        routes:
          - network: 0.0.0.0/0
            gateway: 192.168.1.1
        vip:
          ip: 192.168.1.80
  - hostname: vultr-worker-01
    ipAddress: 45.32.146.110
    controlPlane: false
    arch: amd64
    installDisk: /dev/vda
  - hostname: vultr-worker-02
    ipAddress: 217.69.4.72
    controlPlane: false
    arch: amd64
    installDisk: /dev/vda
controlPlane:
  patches:
    - |-
      - op: add
        path: /cluster/proxy/disabled
        value: true
  schematic:
    customization:
      extraKernelArgs:
        - net.ifnames=0
      systemExtensions:
        officialExtensions:
          - siderolabs/qemu-guest-agent
          - siderolabs/iscsi-tools
worker:
  schematic:
    customization:
      extraKernelArgs:
        - net.ifnames=0
      systemExtensions:
       officialExtensions:
         - siderolabs/iscsi-tools
⚠️ Please note, on Vultr, the installation disk is /dev/vdaand not /dev/sda.
$ talosctl apply-config --talosconfig=./clusterconfig/talosconfig --nodes=192.168.1.85 --file=./clusterconfig/cross-region-cluster-controlplane-01.yaml --insecure;
$ talosctl apply-config --talosconfig=./clusterconfig/talosconfig --nodes=192.168.1.79 --file=./clusterconfig/cross-region-cluster-controlplane-02.yaml --insecure;
$ talosctl apply-config --talosconfig=./clusterconfig/talosconfig --nodes=192.168.1.82 --file=./clusterconfig/cross-region-cluster-controlplane-03.yaml --insecure;
$ talosctl apply-config --talosconfig=./clusterconfig/talosconfig --nodes=45.32.146.110 --file=./clusterconfig/cross-region-cluster-vultr-worker-01.yaml --insecure;
$ talosctl apply-config --talosconfig=./clusterconfig/talosconfig --nodes=217.69.4.72 --file=./clusterconfig/cross-region-cluster-vultr-worker-02.yaml --insecure;
$ talosctl bootstrap --talosconfig=./clusterconfig/talosconfig --nodes=192.168.1.85;
I then install Cilium on my cluster:
helm install \
    cilium \
    cilium/cilium \
    --version 1.15.0 \
    --namespace kube-system \
    --set=ipam.mode=kubernetes \
    --set=kubeProxyReplacement=true \
    --set=securityContext.capabilities.ciliumAgent="{CHOWN,KILL,NET_ADMIN,NET_RAW,IPC_LOCK,SYS_ADMIN,SYS_RESOURCE,DAC_OVERRIDE,FOWNER,SETGID,SETUID}" \
    --set=securityContext.capabilities.cleanCiliumState="{NET_ADMIN,SYS_ADMIN,SYS_RESOURCE}" \
    --set=cgroup.autoMount.enabled=false \
    --set=cgroup.hostRoot=/sys/fs/cgroup \
    --set=k8sServiceHost=localhost \
    --set=k8sServicePort=7445
My cluster now has five nodes, three control-planes on my local network and two workers on Vultr.
$ kubectl get nodes
NAME              STATUS   ROLES           AGE     VERSION
controlplane-01   Ready    control-plane   6m43s   v1.29.1
controlplane-02   Ready    control-plane   6m40s   v1.29.1
controlplane-03   Ready    control-plane   6m42s   v1.29.1
vultr-worker-01   Ready    <none>          6m40s   v1.29.1
vultr-worker-02   Ready    <none>          6m45s   v1.29.1
Add Node to Multi-Region Cluster
I’m going to add a sixth node to my cluster, but this time on my virtualized infrastructure at OVH (in a datacenter in Roubaix) .
I already have a virtual machine there ready and waiting for a Talos configuration. In its private network, it has the IP address 192.168.128.112.
I then add it to my file talconfig.yaml:
- hostname: ovh-worker-03
  ipAddress: 192.168.128.112
  controlPlane: false
  arch: amd64
  installDisk: /dev/sda
I connect to the bastion (on which I have already configured talosctl) , and I apply the configuration on the machine.
$ talosctl apply-config --talosconfig=./clusterconfig/talosconfig --nodes=192.168.128.112 --file=./clusterconfig/cross-region-cluster-ovh-worker-03.yaml --insecure;As it stands, it doesn’t work. The reason is that for the worker to join the cluster, it must be able to communicate with the controlplanes. This communication is done with the port 51820(in UDP), the worker or the control-plane must be able to connect to the other’s port for the connection to be established.
$ talosctl get kubespanpeerstatus -n 192.168.1.85
192.168.1.85       kubespan   KubeSpanPeerStatus   DT8v2yiopnU6aPp3nxJurX/HfFTWy4dj1haWXINXjhc=   60   vultr-worker-01   45.32.146.110:51820   up   1723500   3403308
192.168.1.85       kubespan   KubeSpanPeerStatus   F2nTY5mP5aVBKRz5V1Bl5Ba93+G6EWY12SKT5PSnpFI=   62   vultr-worker-02   217.69.4.72:51820   up   449052   641764
192.168.1.85       kubespan   KubeSpanPeerStatus   UelYhx04oUfdS5X+yNf+1dOsvTzfBZc+WrH/GY4HKWU=   23   ovh-worker-03   5.39.75.213:51820   unknown   0   17168
192.168.1.85       kubespan   KubeSpanPeerStatus   Vbvp05aKjlLhXb6KD2zo5C6aneRQEpsLEZ/AQLjXlmU=   62   controlplane-03   192.168.1.82:51820   up   18745312   37628360
192.168.1.85       kubespan   KubeSpanPeerStatus   o9BLRyCBgMyJoNbEqdaD16PY2sPSLkXUaj4Vy+qBl3U=   63   controlplane-02   192.168.1.79:51820   up   17769228   27982564
Currently, nodes are trying requests to 51820node port ovh-worker-03. KubeSpan client will try all interfaces (IPv4 and IPv6) to connect to the node but… impossible since I didn’t open the port from my PFSense router.
One port opening later…

$ talosctl get kubespanpeerstatus -n 192.168.1.85
NODE           NAMESPACE   TYPE                 ID                                             VERSION   LABEL             ENDPOINT              STATE   RX         TX
192.168.1.85   kubespan    KubeSpanPeerStatus   DT8v2yiopnU6aPp3nxJurX/HfFTWy4dj1haWXINXjhc=   75        vultr-worker-01   45.32.146.110:51820   up      2169468    4172648
192.168.1.85   kubespan    KubeSpanPeerStatus   F2nTY5mP5aVBKRz5V1Bl5Ba93+G6EWY12SKT5PSnpFI=   77        vultr-worker-02   217.69.4.72:51820     up      547696     748732
192.168.1.85   kubespan    KubeSpanPeerStatus   UelYhx04oUfdS5X+yNf+1dOsvTzfBZc+WrH/GY4HKWU=   38        ovh-worker-03     5.39.75.213:51820     up      314900     997748
192.168.1.85   kubespan    KubeSpanPeerStatus   Vbvp05aKjlLhXb6KD2zo5C6aneRQEpsLEZ/AQLjXlmU=   77        controlplane-03   192.168.1.82:51820    up      23345384   45761364
192.168.1.85   kubespan    KubeSpanPeerStatus   o9BLRyCBgMyJoNbEqdaD16PY2sPSLkXUaj4Vy+qBl3U=   78        controlplane-02   192.168.1.79:51820    up      22072656   33896416
$ kubectl get nodes
NAME              STATUS   ROLES           AGE    VERSION
controlplane-01   Ready    control-plane   33m    v1.29.1
controlplane-02   Ready    control-plane   33m    v1.29.1
controlplane-03   Ready    control-plane   33m    v1.29.1
ovh-worker-03     Ready    <none>          5m6s   v1.29.1
vultr-worker-01   Ready    <none>          33m    v1.29.1
vultr-worker-02   Ready    <none>          34m    v1.29.1
So, ovh-worker-03has indeed joined the cluster, and is ready to host applications!
Since my “production” cluster consists of 3 Raspberry Pis, I can now add nodes from different cloud providers without having to worry about network configuration.

Network benchmark between nodes
Obviously, with a multi-region cluster, we can ask ourselves the question of network performance. So I used the k8s-Bench-Suite project offering a script to benchmark network performance between nodes.
Note that network performance is highly dependent on the quality of the connection between nodes.
My internet speed is ~300Mbps (symmetrical) with the Sosh Fiber offer.
My internet speed :
Speedtest by Ookla

      Server: LASOTEL - Lyon (id: 42393)
         ISP: Orange
Idle Latency:     2.01 ms   (jitter: 0.08ms, low: 1.93ms, high: 2.08ms)
    Download:   283.37 Mbps (data used: 208.0 MB)
                  9.38 ms   (jitter: 0.81ms, low: 5.76ms, high: 15.31ms)
      Upload:   297.00 Mbps (data used: 356.2 MB)
                 37.01 ms   (jitter: 1.11ms, low: 13.53ms, high: 41.06ms)
 Packet Loss:     0.0%
Vultr Server Throughput :
Speedtest by Ookla

      Server: Nextmap - LeKloud - Paris (id: 33869)
         ISP: Vultr
Idle Latency:     1.39 ms   (jitter: 0.73ms, low: 0.94ms, high: 3.18ms)
    Download:  1257.66 Mbps (data used: 1.5 GB)
                  6.56 ms   (jitter: 19.39ms, low: 1.08ms, high: 452.37ms)
      Upload:  3550.69 Mbps (data used: 3.2 GB)
                  3.58 ms   (jitter: 4.17ms, low: 1.16ms, high: 74.61ms)
 Packet Loss:     0.0%
(We can immediately see where the bottleneck in network performance will be.)
Let’s run the benchmark between two nodes in the same network ( controlplane-01and controlplane-02):
=========================================================
 Benchmark Results
=========================================================
 Name            : knb-1012758
 Date            : 2024-02-24 07:49:12 UTC
 Generator       : knb
 Version         : 1.5.0
 Server          : controlplane-02
 Client          : controlplane-01
 UDP Socket size : auto
=========================================================
  Discovered CPU         : QEMU Virtual CPU version 2.5+
  Discovered Kernel      : 6.1.78-talos
  Discovered k8s version :
  Discovered MTU         : 1500
  Idle :
    bandwidth = 0 Mbit/s
    client cpu = total 8.23% (user 3.65%, nice 0.00%, system 3.19%, iowait 0.56%, steal 0.83%)
    server cpu = total 7.11% (user 3.14%, nice 0.00%, system 2.77%, iowait 0.60%, steal 0.60%)
    client ram = 1231 MB
    server ram = 1179 MB
  Pod to pod :
    TCP :
      bandwidth = 287 Mbit/s
      client cpu = total 70.99% (user 4.76%, nice 0.00%, system 45.39%, iowait 0.40%, steal 20.44%)
      server cpu = total 73.55% (user 4.42%, nice 0.00%, system 51.63%, iowait 0.22%, steal 17.28%)
      client ram = 1239 MB
      server ram = 1182 MB
    UDP :
      bandwidth = 194 Mbit/s
      client cpu = total 72.85% (user 8.15%, nice 0.00%, system 52.78%, iowait 0.18%, steal 11.74%)
      server cpu = total 65.34% (user 6.35%, nice 0.00%, system 42.11%, iowait 0.17%, steal 16.71%)
      client ram = 1241 MB
      server ram = 1180 MB
  Pod to Service :
    TCP :
      bandwidth = 288 Mbit/s
      client cpu = total 72.91% (user 5.87%, nice 0.00%, system 45.40%, iowait 0.20%, steal 21.44%)
      server cpu = total 75.97% (user 4.40%, nice 0.00%, system 52.85%, iowait 0.19%, steal 18.53%)
      client ram = 1247 MB
      server ram = 1182 MB
    UDP :
      bandwidth = 194 Mbit/s
      client cpu = total 72.61% (user 6.79%, nice 0.00%, system 52.33%, iowait 0.41%, steal 13.08%)
      server cpu = total 63.99% (user 6.40%, nice 0.00%, system 40.88%, iowait 0.35%, steal 16.36%)
      client ram = 1247 MB
      server ram = 1180 MB
=========================================================
A throughput of 288 Mbps in TCP in pod-to-service (which represents the majority of communication in a Kubernetes cluster) is very good.
Now let’s see the performance between two nodes in different networks ( controlplane-01and vultr-worker-01):
=========================================================
 Benchmark Results
=========================================================
 Name            : knb-1020457
 Date            : 2024-02-24 08:13:47 UTC
 Generator       : knb
 Version         : 1.5.0
 Server          : vultr-worker-04
 Client          : controlplane-01
 UDP Socket size : auto
=========================================================
  Discovered CPU         : AMD EPYC-Rome Processor
  Discovered Kernel      : 6.1.78-talos
  Discovered k8s version :
  Discovered MTU         : 1500
  Idle :
    bandwidth = 0 Mbit/s
    client cpu = total 8.09% (user 3.55%, nice 0.00%, system 2.95%, iowait 0.75%, steal 0.84%)
    server cpu = total 2.52% (user 1.42%, nice 0.00%, system 0.92%, iowait 0.00%, steal 0.18%)
    client ram = 1232 MB
    server ram = 442 MB
  Pod to pod :
    TCP :
      bandwidth = 22.0 Mbit/s
      client cpu = total 14.33% (user 3.72%, nice 0.00%, system 8.78%, iowait 0.56%, steal 1.27%)
      server cpu = total 17.78% (user 1.69%, nice 0.00%, system 14.95%, iowait 0.00%, steal 1.14%)
      client ram = 1237 MB
      server ram = 443 MB
    UDP :
      bandwidth = 31.4 Mbit/s
      client cpu = total 68.58% (user 6.66%, nice 0.00%, system 58.55%, iowait 0.37%, steal 3.00%)
      server cpu = total 19.31% (user 1.89%, nice 0.00%, system 16.27%, iowait 0.00%, steal 1.15%)
      client ram = 1238 MB
      server ram = 445 MB
  Pod to Service :
    TCP :
      bandwidth = 15.0 Mbit/s
      client cpu = total 13.69% (user 3.63%, nice 0.00%, system 8.24%, iowait 0.70%, steal 1.12%)
      server cpu = total 14.28% (user 1.42%, nice 0.00%, system 11.85%, iowait 0.00%, steal 1.01%)
      client ram = 1241 MB
      server ram = 444 MB
    UDP :
      bandwidth = 29.5 Mbit/s
      client cpu = total 70.13% (user 6.76%, nice 0.00%, system 60.08%, iowait 0.42%, steal 2.87%)
      server cpu = total 18.93% (user 2.07%, nice 0.00%, system 15.43%, iowait 0.00%, steal 1.43%)
      client ram = 1238 MB
      server ram = 446 MB
We can see right away that the performance between two nodes in different data centers is much lower. As soon as we go through the Internet network, the performance is divided by 10.
I imagine that with a completely cloud cluster, performance would be much better.
Warning
Of course, these benchmarks should be taken with a grain of salt. A real test scenario should be created to evaluate network performance by testing real applications, connection reliability, if there are no packet losses, etc.
This is just a raw network performance test, so don’t jump to conclusions.
Conclusion
Talos is a real favorite for me. It is easy to use, and offers advanced features. The documentation is very complete and the community seems quite active.
The few flaws of the utility talosctl are largely compensated by talhelper. I look forward to seeing the future evolutions of Talos (I also heard that katacontainers are being integrated into Talos 1.7) .
The possibilities of Talos are still numerous, and I am far from having explored everything (we could for example talk about Omni, the SaaS of SideroLabs to deploy nodes in PXE, or even the integration of Talos with certain cloud providers…) .
Until we see all this, I will continue to use Talos for my personal projects, hoping that the community grows and the project continues to evolve.