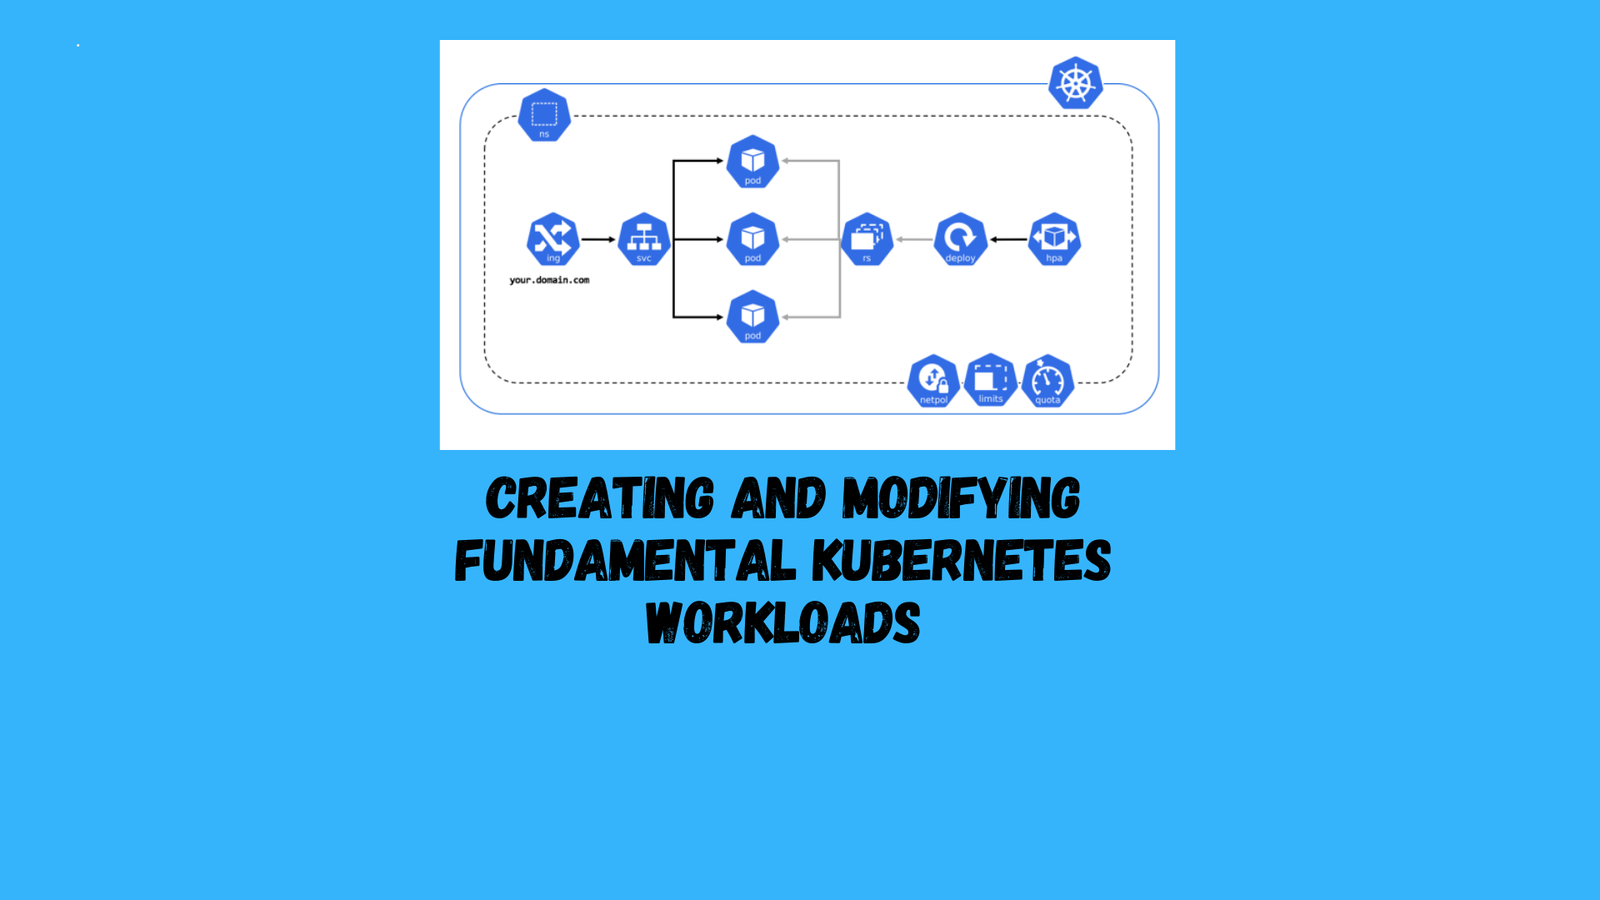
In this post , we introduce guidelines for handling key Kubernetes workload categories: pods and deployments. You’ll learn the methods for crafting deployments and pods, utilizing both CLI commands and YAML manifests. Additionally, we’ll cover strategies for scaling and updating deployments effectively.
Creating a Pod with kubectl run
Use Case
You’re aiming to swiftly deploy a long-lived application, such as a web server, in your Kubernetes cluster.
Solution
The kubectl run command is a quick and efficient way to create a pod. For instance, to launch a pod running an NGINX server:
$ kubectl run nginx --image=nginx
Check the pod’s status with:
$ kubectl get pod/nginx
You should see your nginx pod up and running.
Discussion: kubectl run is versatile, supporting various configurations to tailor your pod setup. Among these, you can:
- Set environment variables using
--env. - Specify container ports with
--port. - Define the command the container executes on start with
--command. - Automatically create a service for the pod with
--expose. - Perform a dry run to validate your command without actual execution using
--dry-run=client.
Examples:
- To deploy an NGINX server that serves on port 2368 and simultaneously create a service for it:
$ kubectl run nginx --image=nginx --port=2368 --expose - To launch a MySQL pod with a predefined root password :
$ kubectl run mysql --image=mysql --env=MYSQL_ROOT_PASSWORD=root - To start a BusyBox container that executes
sleep 3600upon launch:$ kubectl run myshell --image=busybox:1.36 --command -- sh -c "sleep 3600"
For more customization options, kubectl run --help offers a comprehensive list of the available arguments, allowing for a high degree of flexibility in deploying and configuring pods with a simple command.
Deploying an Application with kubectl create deployment
Use Case
You’re looking to deploy a durable application, such as a content management system, in a straightforward manner.
Solution
The kubectl create deployment command is designed for just such a task, allowing you to quickly set up a deployment. For instance, to deploy WordPress:
$ kubectl create deployment wordpress --image wordpress:6.3.1
To verify the deployment:
$ kubectl get deployments.apps/wordpress
You’ll see your wordpress deployment listed, indicating it’s up and running.
Discussion: kubectl create deployment offers flexibility through various flags to fine-tune your deployment. Key options include:
- Specifying container ports using
--port. - Setting the number of replicas with
--replicas. - Performing a dry run to check your command without making any changes using
--dry-run=client. - Outputting the deployment manifest in YAML format with
--output yaml, useful for documentation or further customization.
Examples:
- To deploy a service with a specific port:
$ kubectl create deployment myapp --image=myapp:1.0 --port=8080 - To specify the number of replicas for redundancy or load handling:
$ kubectl create deployment myapp --image=myapp:1.0 --replicas=3 - For testing purposes, to validate your deployment command without executing :
$ kubectl create deployment myapp --image=myapp:1.0 --dry-run=client - To generate a YAML manifest for your deployment (without creating it):
$ kubectl create deployment myapp --image=myapp:1.0 --dry-run=client --output yaml
For a comprehensive overview of all available options, kubectl create deployment --help provides detailed insights, allowing for extensive customization of your Kubernetes deployments.
Deploying Kubernetes Resources with Manifest Files
Use Case
You’re looking to define the configurations of your Kubernetes resources explicitly, rather than using on-the-fly generators like kubectl run.
Solution
Leverage kubectl apply -f <manifest> for deploying or updating resources based on their definitions in YAML or JSON manifest files. This method offers precision and clarity in resource management.
Example: Creating a Namespace
Here’s how to create a namespace using a YAML manifest. Consider a file named myns.yaml with the following content:
apiVersion: v1
kind: Namespace
metadata:
  name: myns
Execute the following command to create the namespace:
$ kubectl apply -f myns.yaml
Verify its creation with:
$ kubectl get namespaces
Discussion: kubectl apply isn’t limited to local files. You can directly apply configurations from URLs hosting raw YAML or JSON. This is particularly useful for deploying applications or configurations shared publicly.
Deploying Applications from URL Manifests
For example, to deploy the Guestbook application using its online manifest:
$ kubectl apply -f https://raw.githubusercontent.com/kubernetes/examples/master/guestbook/all-in-one/guestbook-all-in-one.yaml
Afterwards, you can check the deployed resources associated with the Guestbook application:
$ kubectl get all
This method simplifies the deployment process, especially for complex applications, by allowing you to apply a comprehensive configuration with a single command. It supports both development and production workflows by ensuring configurations are explicitly declared and version-controlled.
Create a Pod Manifest File
Use Case
You’re interested in declaratively creating a pod through a YAML manifest file rather than using imperative commands like kubectl run. This approach gives you more control over the pod’s configuration and is essential for version-controlled infrastructure as code.
Solution
Creating a pod in Kubernetes requires defining a few key sections in the YAML manifest: apiVersion, kind, metadata, and spec. Here’s a step-by-step guide to writing a basic pod manifest with a single container.
Basic Pod Manifest Structure:
- apiVersion: Specifies the version of the Kubernetes API you’re using.
- kind: The type of object you’re creating, which is Pod for this case.
- metadata: Metadata about the pod, like its name.
- spec: The specification of the pod, including the container(s) it should run.
Example of a Simple Pod Manifest:
apiVersion: v1teckbootcamps
kind: Pod
metadata:
name: teckbootcamps
spec:
containers:
- name:
image: nginx:1.25.2
Creating the Pod:
- Save the above YAML to a file named
teckbootcamps.yaml. - Apply the manifest using
kubectl:
$ kubectl apply -fteckbootcamps.yaml
- Verify the pod’s creation:
$ kubectl get all
Discussion: The provided example is a minimal functional pod manifest. Pods can be more complex, containing multiple containers, volumes, and various configurations for networking, storage, and more.
Example with Multiple Containers:
To include another container within the same pod (for instance, a Redis container), you can extend the spec.containers array:
apiVersion: v1teckbootcamps
kind: Pod
metadata:
name:teckbootcamps
spec:
containers:
- name:
image: nginx:1.25.2
- name: safari
image: redis:7.2.0
This manifest defines a pod named teckbootcamps that runs two containers: an NGINX web server and a Redis server. Remember, containers within the same pod share the same network namespace, meaning they can communicate using localhost and share data through volumes if configured.
Final Note: Writing manifests by hand offers deep insight into the workings of Kubernetes objects, making it easier to understand how components interrelate and providing a foundation for more complex configurations.